RESOURCE
Prompt writing guide for AI image generation: photographic and design terminology
13 July 2024 – Vol 2, Issue 4.
How to create a high-contrast scene, or capture dynamic movement? How to control light and shadows, or use angles to add depth to your images?
The following list describes concepts in photography and design, with practical prompt examples. This will guide you in achieving photographic effects, which you can use when creating AI images.
-
Core photography principles:
- Shutter speed – the amount of time the shutter is open, capturing the light of the scene.
“A long-exposure shot of city lights creating light trails”.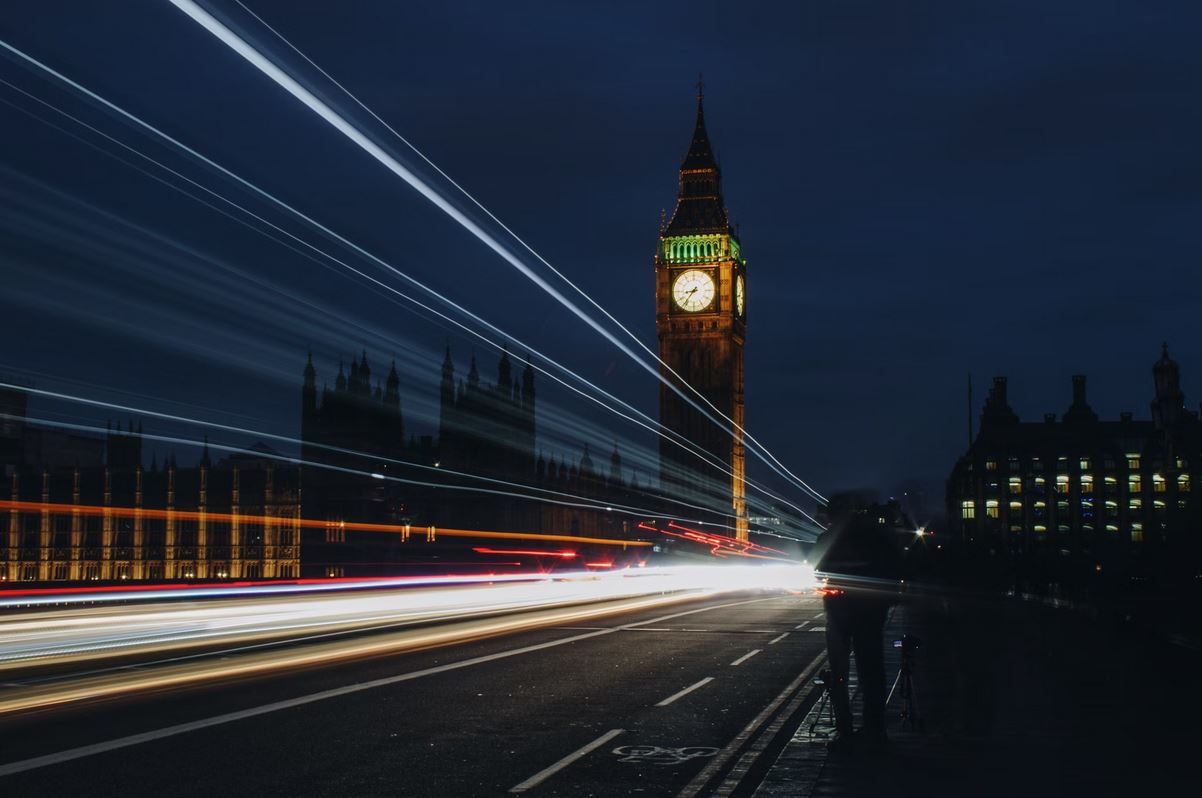
Long-exposure shutter speed. Photo by Louis. K, in public domain.
- Aperture – the lens’ opening size. This controls the amount of light that comes through the lens, affecting the depth of field.
“A close-up portrait with a shallow depth of field focusing on the eyes”. - Composition – how the elements are placed.
“A person walking down a path, with tall trees lining both sides and leading the viewer’s eye toward the person in the centre”. - Texture – surface detail.
“A rough tree bark, showing fine details in the wood grain”. - Focus – the clarity of the subject in the photo.
“A sharply focused image of a bee collecting pollen, with the background flowers softly blurred to emphasize the subject”.
- Shutter speed – the amount of time the shutter is open, capturing the light of the scene.
-
Angle and Perspective:
- Close-up – a tightly framed shot focusing on a detail.
“A close-up shot focusing on the eyes of a man”. - Macro close-up – macro lenses are used to take pictures of textures or small elements.
“Macro shot of a ladybug”.
Macro close-up. Photo by Eric Muhr, in public domain.
- Wide–angle – normally would be captured by an 18mm lens, used to capture a landscape.
“A wide-angle view capturing the whole mountain range”. - Fish-eye – wider than a wide angle, captures almost 180º.
“A fish-eye view of a city street”. - High-angle – point of view from above, looking down.
“A high-angle shot capturing the subject from above”. - Low-angle – point of view from below.
“A low-angle view looking up at towering trees”. - Worm’s eye view – looking up from the ground level.
“Worm’s eye view of a city”.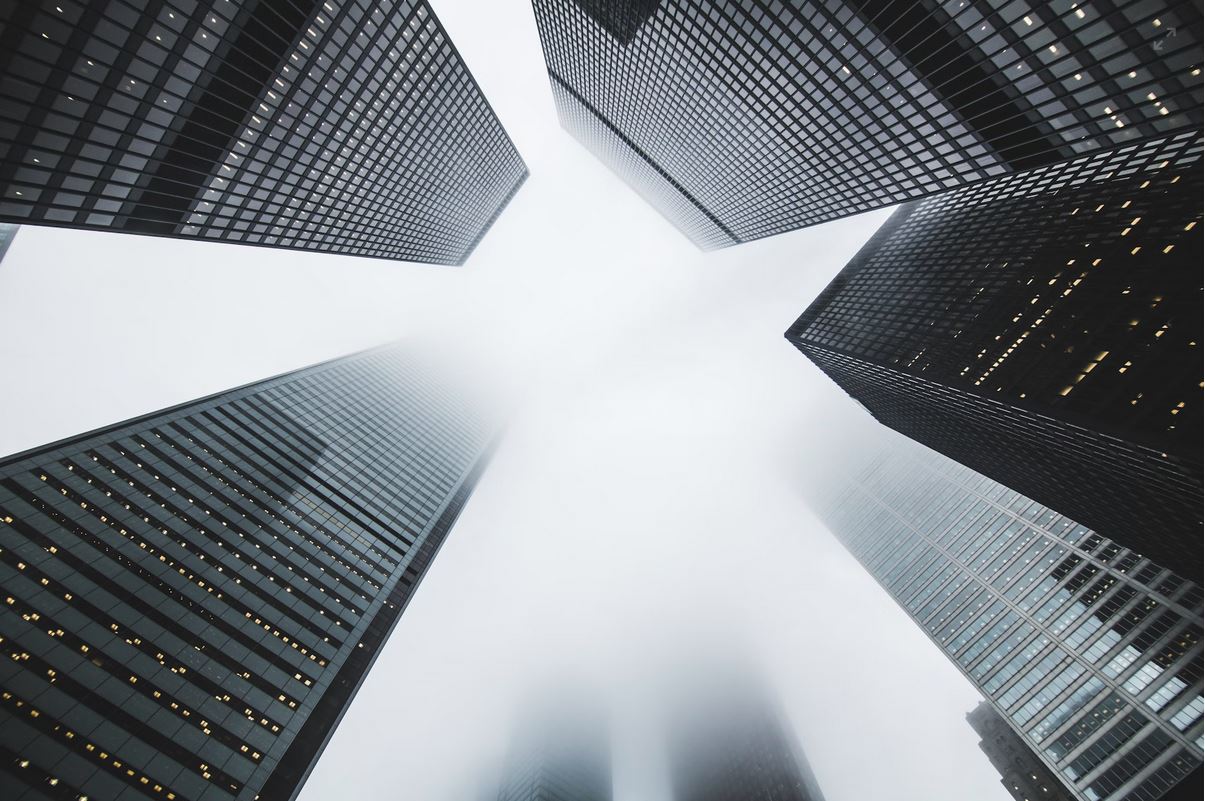
A worm’s eye view. Photo by Matthew Henry, in public domain.
- Eye-level – point of view of a human, around 1.5 metres from the ground. “An eye-level perspective of a person, at the viewer’s height”.
- Bird’s-eye view – point of view from above.
“Bird’s eye view of landscape”. - Zenith angle – directly above the subject, looking straight down.
“Zenith angle from a building”. - Dutch angle/tilt – a slightly tilted perspective.
“Dutch angle view of a man at night, snowy street”.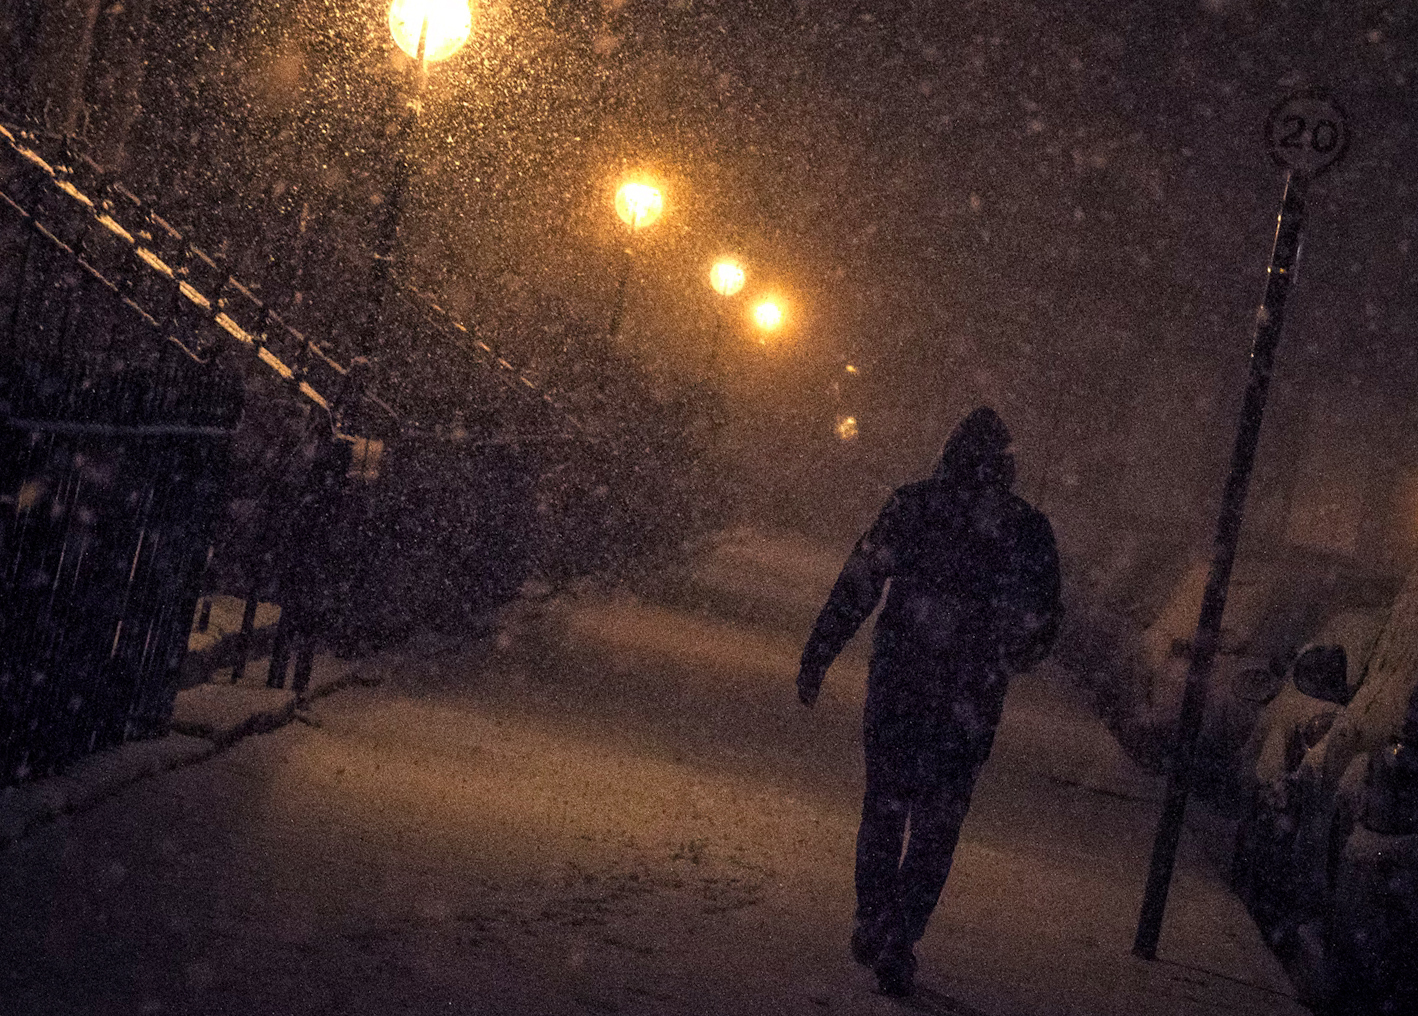
Slightly tilted photo. Photo by Roan Lavery (edited by Gil Dekel), in public domain.
- Close-up – a tightly framed shot focusing on a detail.
-
Lighting:
- Light concepts:
- Highlights – bright or reflective objects that catch and reflect light.
“A mountain landscape at sunrise, with golden sunlight creating bright highlights on the mountain peak”. - Shadows – dark parts of the picture, can create a sense of drama. “Portrait of a man partially lit from the side, casting deep shadows across one side of his face”.
- Contrast – the difference between lights and shadows. High contrast creates drama.
“A high-contrast night scene of a city skyline, with brightly lit skyscrapers”. - Underexposed – an image that is too dark because of the camera settings.
“A dark underexposed image of flowers”.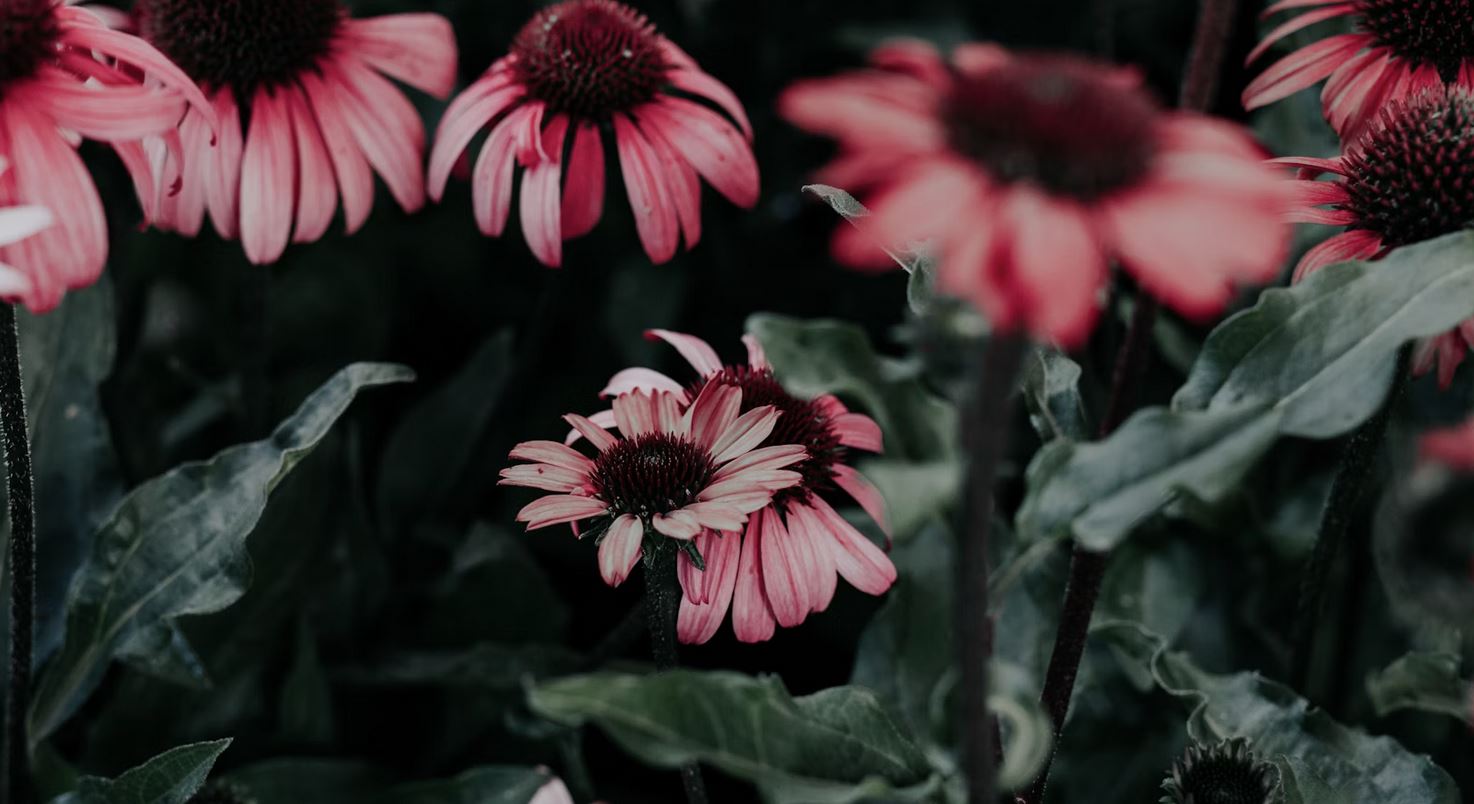
Underexposed photo by Florencia Viadana, in public domain.
- Overexposed – an image that is too bright because of the camera settings. The sensor captured too much light.
“A light overexposed image of the sky”. - High key – a style in photography of over-exposing, resulting in bright light with minimal shadows.
“A high-key photograph of two people hugging in a bright, white room, with soft, even lighting”. - Low key – a style in photography of underexposure images, with very low lighting and high contrast to create a dark, moody, atmosphere.
“A low-key effect of a person in a dimly lit room”.
- Highlights – bright or reflective objects that catch and reflect light.
- Light source:
- Natural light – coming from the sun; more pleasant to see.
“Portrait with natural light”. - Artificial light – can be from a bulb, flash, fluorescent.
“Object close up with artificial light”.
- Natural light – coming from the sun; more pleasant to see.
- Direction:
- Key light – the primary light source that focuses on the main subject.
“A portrait with key light coming from the side, casting a soft glow on the subject’s face while gently fading into shadow on the opposite side”. - Direct light – shines directly on the subject without diffusion, often creating strong, sharp shadows.
“A portrait in direct light, with sunlight illuminating the subject’s face and highlighting her features, creating defined shadows and a bright, vivid contrast against the background”.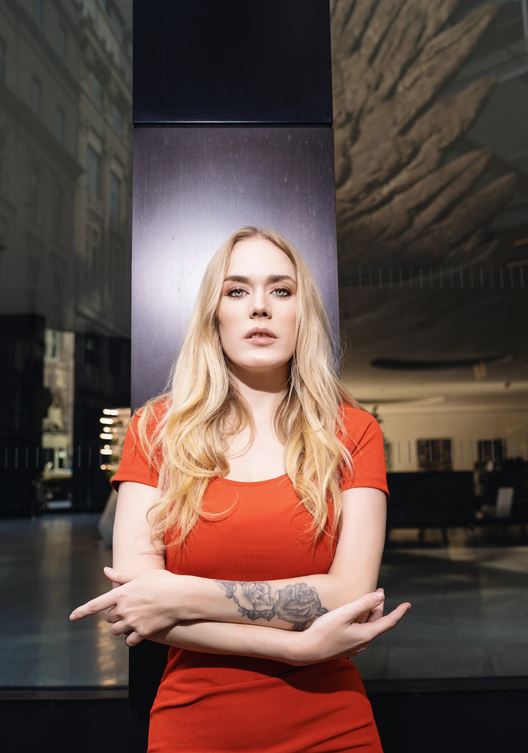
Direct light. Photo by Janis Dzenis, in public domain.
- Diffused light – Soft, scattered light, often from clouds or a diffuser. Minimal harsh shadows, creating a gentle look.
“A person standing against a plain background, softly illuminated by diffused light that creates a smooth gradient of pink and blue hues, with minimal shadows”.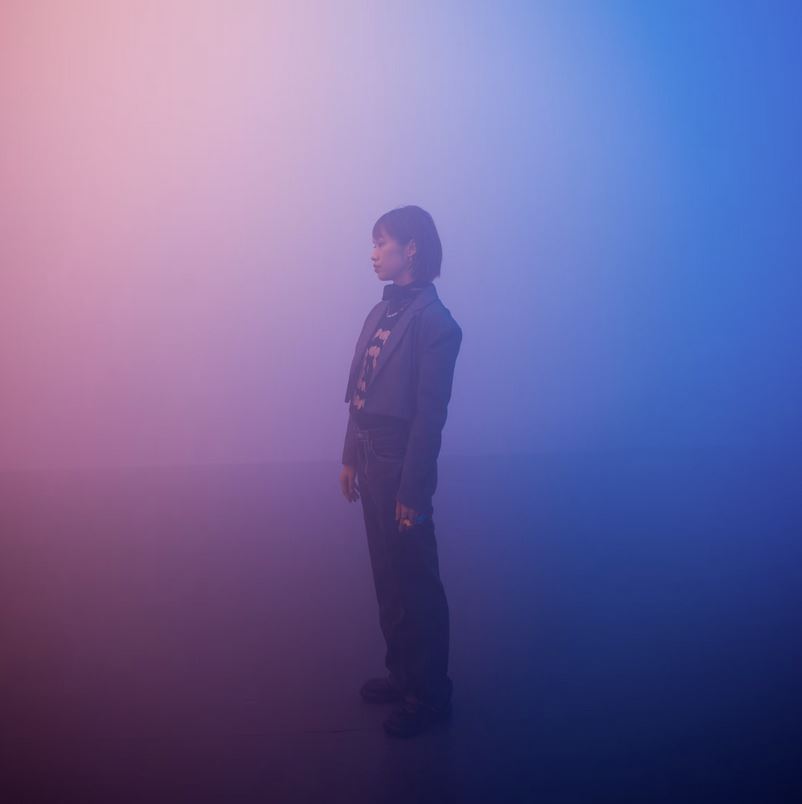
Diffused light. Photo by Dynamic Wang, in public domain.
- Reflected light – light that bounces into an object. White objects reflect more light than black objects.
“A portrait with soft, reflected light coming from the side, bouncing off a nearby white wall to gently illuminate the subject’s face”. - Fill light – the second source of light that reduces shadows (that are created by the main light).
“A portrait with a main light illuminating the subject from one side and a softer fill light on the opposite side, gently reducing shadows for a balanced look”. - Backlight – illuminates the entire back of the subject, creating a halo effect.
“A portrait with a warm backlight shining from behind the subject, creating a soft halo effect around their hair and shoulders”. - Rim light – a focused backlight, outlining only the edges (like hair or shoulders) for a defined, highlighted border.
“A portrait with a soft rim light positioned behind the subject, creating a subtle outline around their hair and shoulders, adding depth and separation from the background”. - Top or bottom light – create strong shadows.
“Portrait with light coming from the bottom to create scary shadows under his eyes”. - Side light – highlights the subject’s texture.
“Portrait with light coming from the side to highlight skin’s texture”.
- Key light – the primary light source that focuses on the main subject.
- Light concepts:
-
Composition:
- Framing:
- Vignette – darkens or fades the edges of an image, drawing the viewer’s focus toward the centre.
“Image of a landscape with a black vignette”. - Centred or off-centre focal points – the object is, or is not, at the centre of the frame.
“Street photography with an old man centred”. - Leading lines – guiding the eye toward the horizon or an object.
“Street photo with buildings creating leading lines to a person who is far away”. - Symmetrical vs. asymmetrical – placing a subject in the centre, or a few objects that are balanced vs. on one side.
“A grand museum gallery with tall red pillars, showcasing ancient statues and artifacts, with visitors exploring the exhibits in a spacious, symmetrical hall”.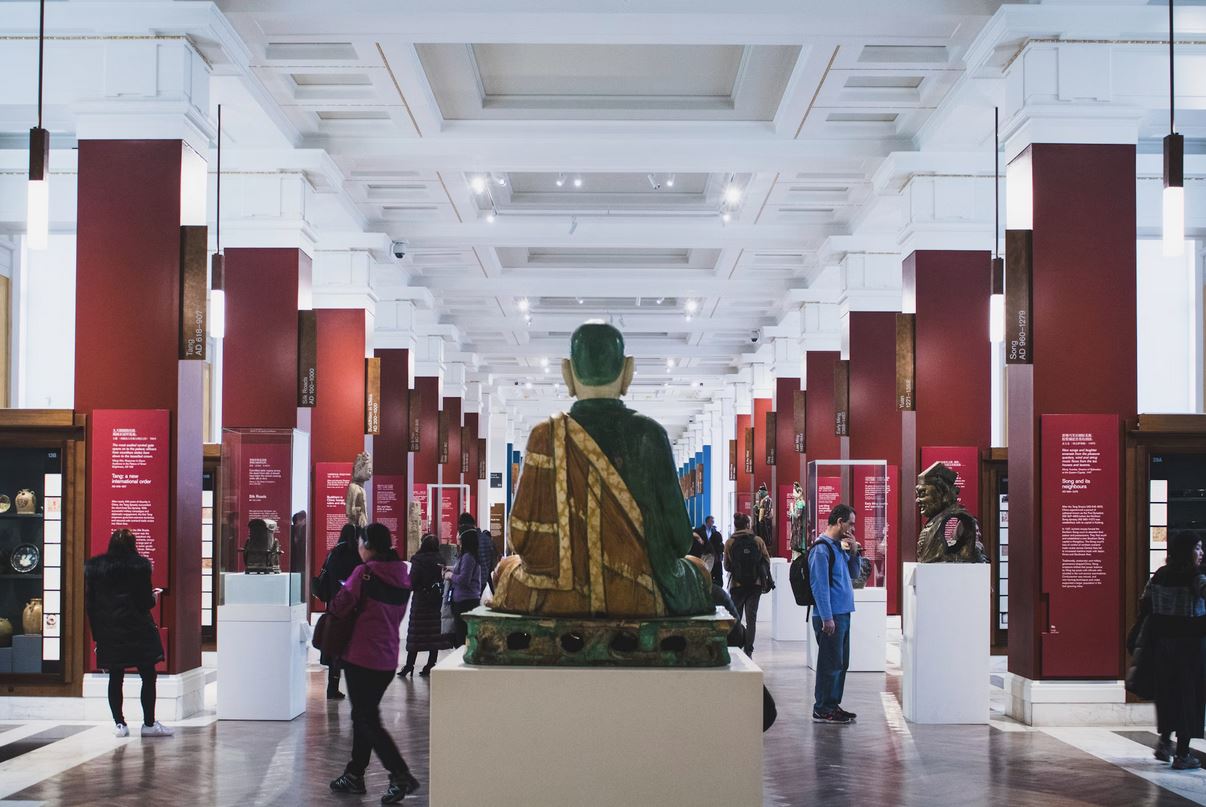
Symmetry. Photo by Nicole Baster, in public domain.
- Layering – arranging elements in the foreground, middle ground, and background to create depth.
“People in the foreground, buildings in the middle ground, and mountains in the background, creating a layered, three-dimensional effect”.
- Vignette – darkens or fades the edges of an image, drawing the viewer’s focus toward the centre.
- Movement and Stillness:
- Freezing movement – capturing a moving subject with a fast shutter speed to make it appear perfectly still and sharp in the image.
“A person mid-jump, with every detail frozen sharply in motion”.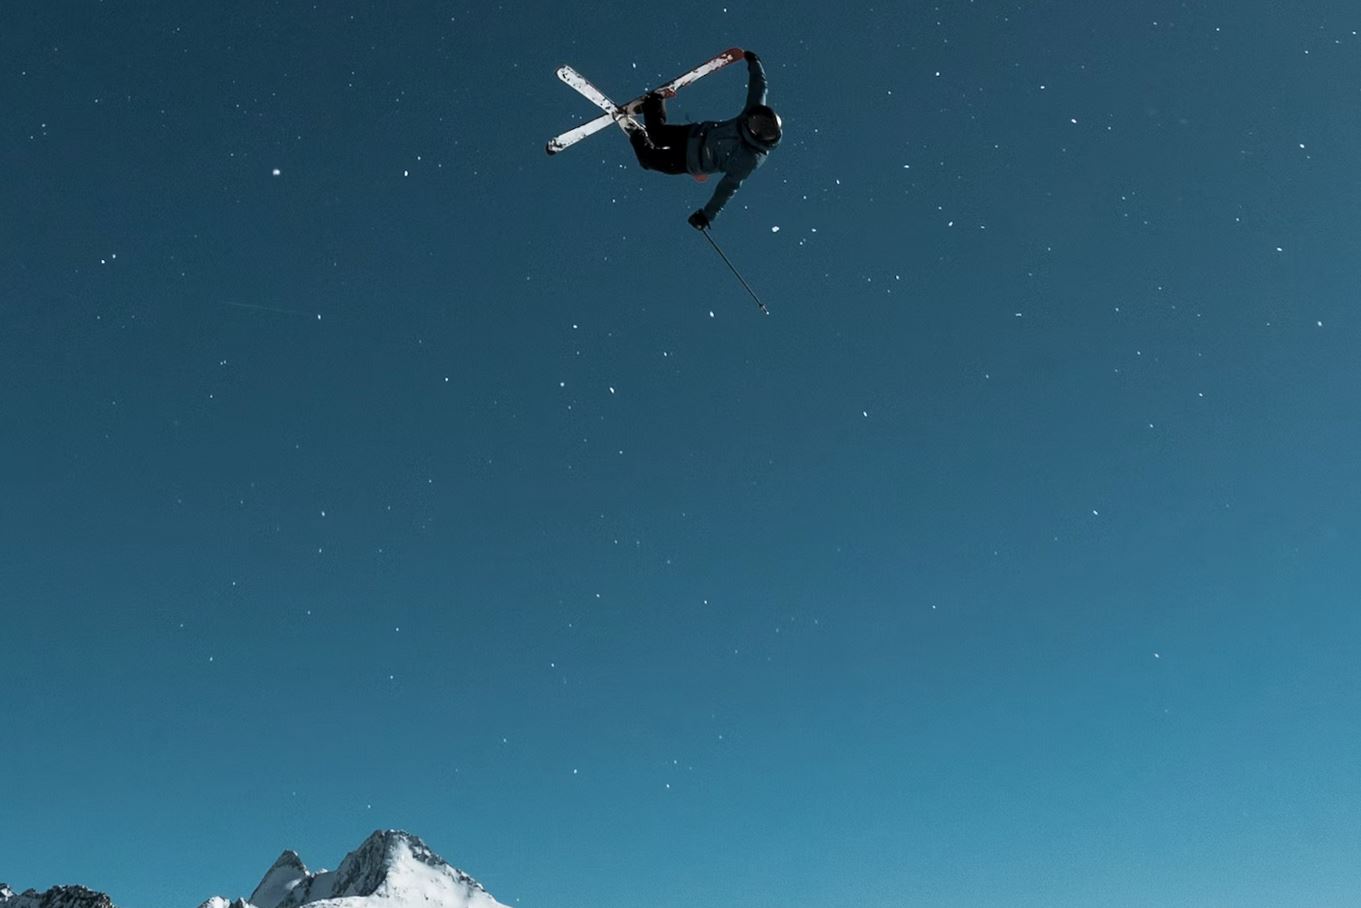
Frozen moment. Photo by Jörg Angeli, in public domain.
- Silky effect – capturing motion, usually of water, with a slow shutter speed while the camera remains steady, creating a soft, smooth, flowing appearance.
“Waterfall with a silky effect”. - Sweep (Panning) – a slow shutter speed while moving the camera along with a moving subject, to create a sharp subject with blurred background.
“Sweep picture following a car”.
- Freezing movement – capturing a moving subject with a fast shutter speed to make it appear perfectly still and sharp in the image.
- Framing:
-
Colour:
- Scheme Types:
- Monochrome – a single colour, including its shades (darker) and tints (lighter).
“Monochromatic picture of the ocean”. - Complementary – colours that are opposite each other on the colour wheel, such as yellow/purple, orange/blue, or red/green. When paired, they create a strong contrast and visual interest.
“A sunset scene with complementary colours, where the orange sky contrasts with deep blue water”. - Saturation – intense colours.
“Landscape with saturated colours, where the greens and blues are vibrant and rich”. - Pastel – soft colours.
“Ocean, pastel colours”.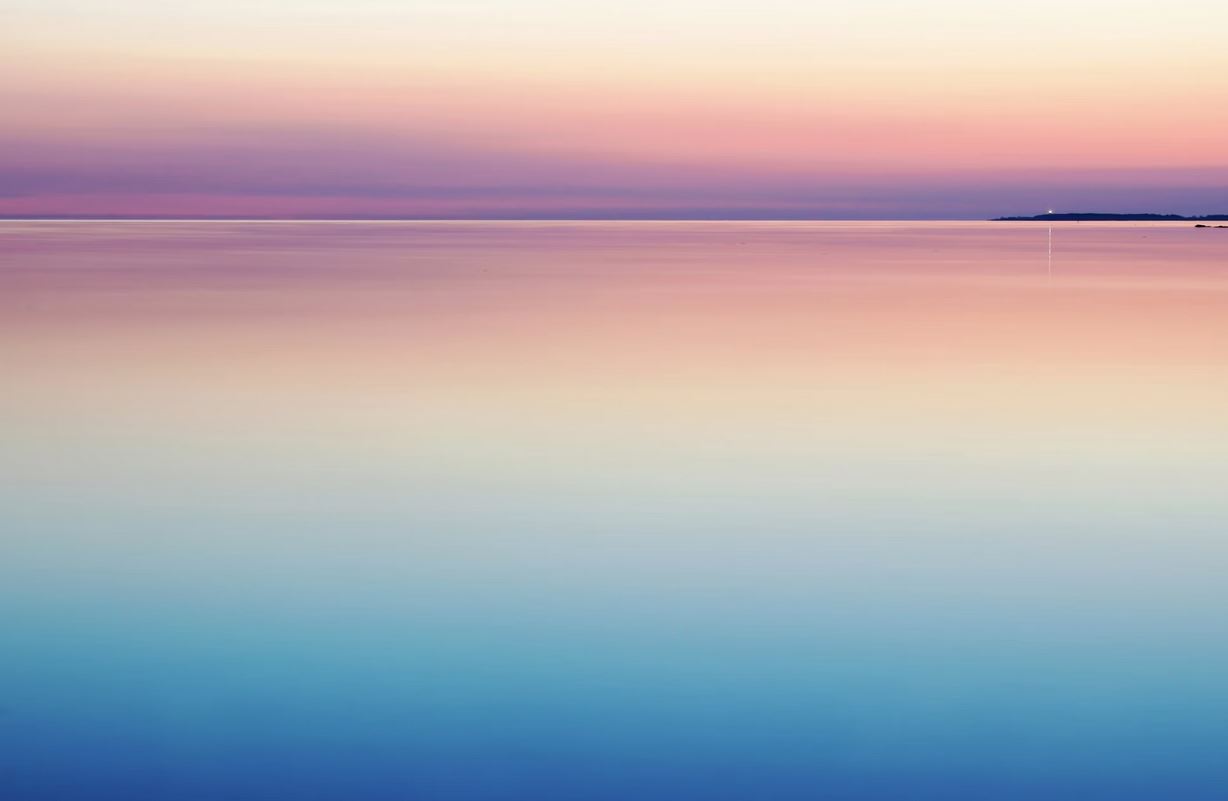
Pastel colours photo, by Harli Marten, in public domain.
- Vibrancy – vivid colours, emphasizing the vividness of mid-tones without oversaturating already bright areas. It is similar to saturation but adjusts colours more subtly, preserving natural tones.
“A landscape with vivid colours”.
- Monochrome – a single colour, including its shades (darker) and tints (lighter).
- Temperature and tone:
- Warm tone – a colour scheme dominated by shades of yellow, orange, and red, often creating a cosy or inviting feel.
“A warm-tone image of a bonfire, with glowing reds and oranges enhancing the cosy atmosphere”. - Cold tone – a colour scheme associated with blues and greens, often evoking a sense of calm, coolness, or melancholy.
“A cold-tone image of a narrow cobblestone alley lined with tall, muted buildings, where soft blues and greys create a quiet, serene ambience”.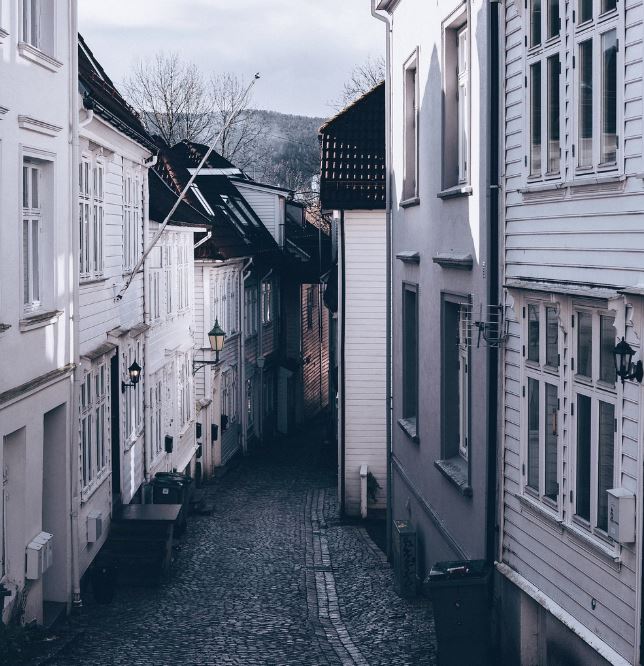
Cold tone photo by Florencia Viadana, in public domain.
- Sepia – a monochromatic effect that adds warm brown tones to an image, giving it an aged, vintage look.
“An old picture with sepia tone”.
- Warm tone – a colour scheme dominated by shades of yellow, orange, and red, often creating a cosy or inviting feel.
- Time of Day:
- Golden hour – he period shortly after sunrise or before sunset when natural light is soft, warm, and golden due to the low angle of the sun.
“A landscape bathed in golden hour light, with warm yellow and orange tones enhancing the scene’s glow”. - Blue hour – Just before sunrise or after sunset when natural light appears cool and blue.
“A landscape captured during blue hour, with soft blue tones creating a calm, serene mood”. - Midday harsh lighting – bright, direct sunlight from overhead, creating strong shadows and high contrast in an image.
“Landscape under midday harsh lighting, with intense sunlight casting sharp shadows and creating bold contrast”.
- Golden hour – he period shortly after sunrise or before sunset when natural light is soft, warm, and golden due to the low angle of the sun.
- Scheme Types:
-
Textures and Detail:
- Texture Types:
- Rough – a strong, coarse texture.
“A close-up of rough bark texture against a smooth, blurred background”. - Smooth – a texture that is even and polished, lacking coarse details, often reflecting light cleanly.
“Smooth snow reflecting light softly”.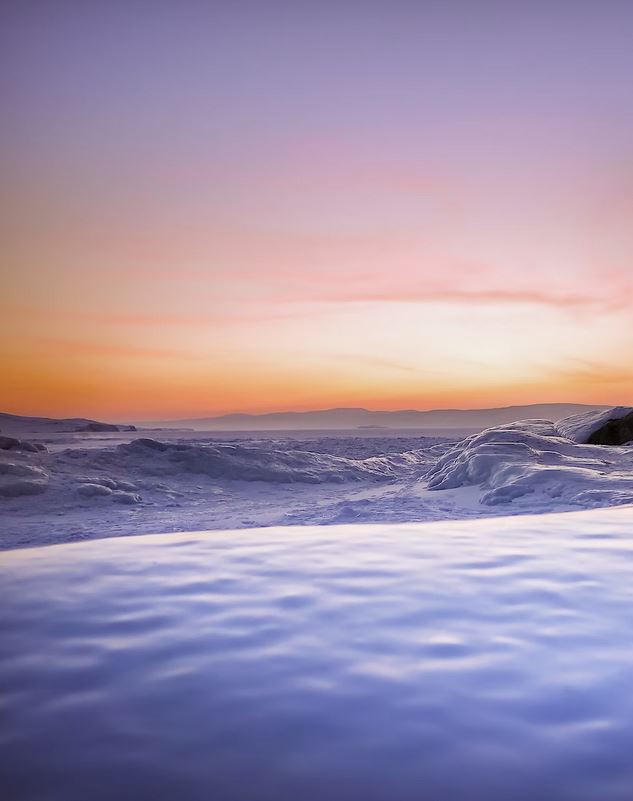
Smooth surface. Photo by Simon Berger (edited by Gil Dekel), in public domain.
- Reflective – light that bounces on a surface. The surface often captures and mirrors surrounding colours and shapes.
“A reflective glass surface capturing ambient colours from nearby lights”. - Matte – a non-reflective surface that absorbs light, reducing glare and reflection
“A matte surface preventing reflection for a softer, muted appearance”. - Textured paper-like effect – a surface with a subtle texture resembling paper, adding a natural, tactile quality to the image.
“A paper-like texture for a natural feel”. - Plain background – a background with a smooth, untextured surface, often used to keep focus on the subject.
Portrait with a studio plain background for a clean, minimal look”.
- Rough – a strong, coarse texture.
- Focus:
- Focused image – an image where the subject is captured with sharp, high detail, enhancing clarity.
“A focused image of eyelashes, showing each lash in sharp detail”. - Blurred – an image where the subject is out of focus or motion-blurred, resulting in softened details and a dreamlike effect.
“Blurred image of eyelashes, with soft, out-of-focus details creating a gentle, dreamy effect”. - Halo – a soft, white glow that spreads across the image, adding a gentle, ethereal quality.
“Children portrait with a halo, with soft light enveloping the scene for a pure, angelic feel”. - Bokeh – a blurred background effect featuring soft, circular lights, often created by out-of-focus light sources, adding depth and visual interest.
“Yellow plants with blurred background with soft circular lights creating a bokeh effect”.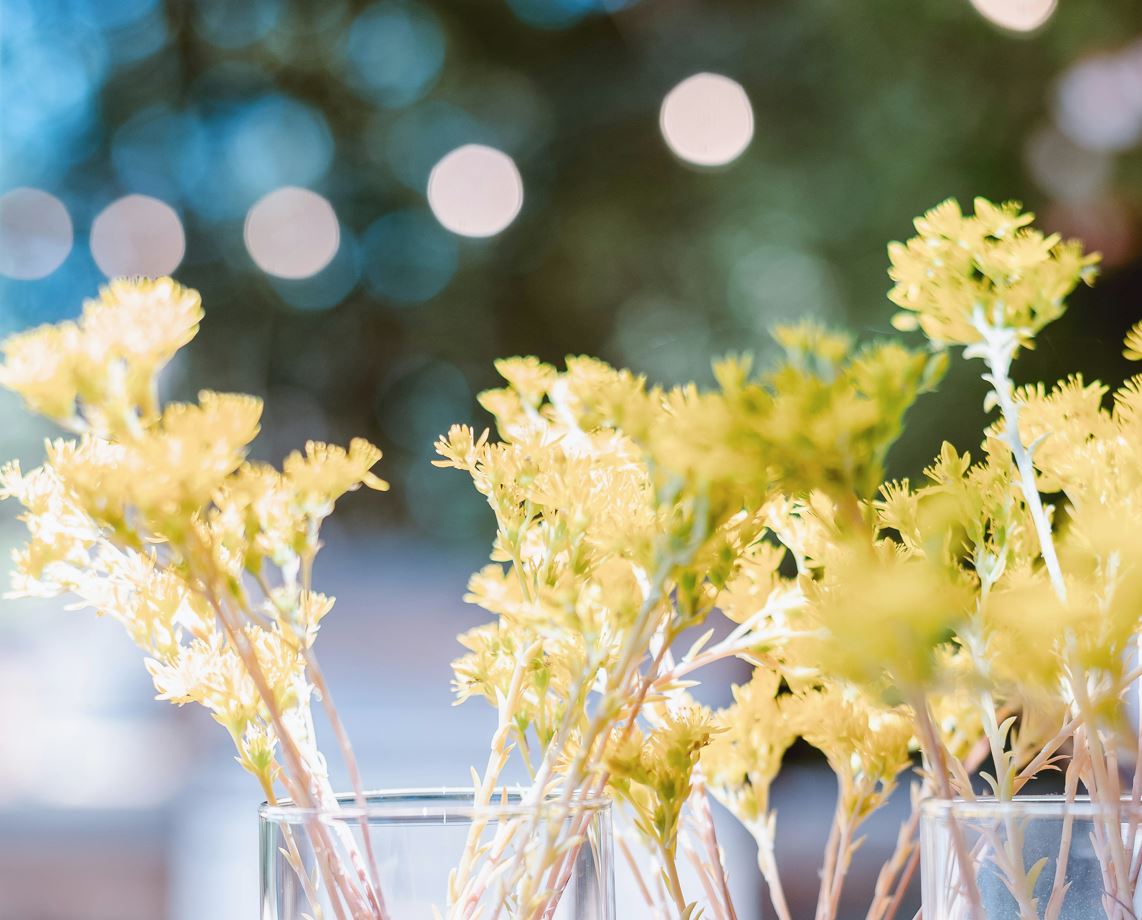
Bokeh. Photo by Tina Witherspoon, in public domain.
- Sharp – lines and details are highly defined, enhancing clarity and focus on textures.
“Sharp image of a worker’s hands, capturing every line and texture in vivid detail”.
Selective focus – this happens when the lens aperture is on a low number like F4, also called Depth of field (“a sharp subject against a blurred background”) - Depth of field – a wide aperture (low f-number) to keep the main subject sharp while blurring the background, creating depth and emphasis.
“a sharp subject against a blurred background, drawing attention to the focused area”.
- Focused image – an image where the subject is captured with sharp, high detail, enhancing clarity.
- Texture Types:
-
Dimensions and orientations:
- Horizontal – the width of the image is greater than its height, often used for landscapes and wide scenes.
“Horizontal picture of the ocean, capturing the vast expanse of water and sky”. - Panoramic – a wide-format image that captures an extended field of view, typically used for landscapes to show a vast scene.
“Panoramic picture of Everest, showcasing the expansive mountain range and surrounding landscape”. - Vertical – the height of the image is greater than its width, often used for portraits or tall subjects.
“Vertical picture of a skyscraper, emphasising its impressive height and structure”. - Square – equal width and height, often used for balanced compositions.
“A square picture, framing the subject symmetrically”.
- Horizontal – the width of the image is greater than its height, often used for landscapes and wide scenes.
My thanks to Gil Dekel for his support.
© Journal of Creativity and Inspiration.
Photos in public domain.
Anna Lofi (López Figueras) is a freelance documentary photographer from Spain, currently travelling the world. She graduated with MA in Photojournalism from the Autonomous University of Barcelona (UAB) and a BA in Audiovisual Communication from Rovira i Virgili University (URV) in Spain and Université Lumière Lyon 2, in France.
Her career began with collaborating with ‘Televisió de Catalunya’ making documentaries for the ‘Blog Europa’ programme. She then completed an internship at ‘Photographic Social Vision’, creating audiovisual content for World Press Photo Barcelona 2015. Anna also volunteered as a photojournalist with ‘NGO Vicente Ferrer’ in rural India and with ‘NoNameKitchen’ along the Balkan route. In 2018, she received the Beca Clic Fotoperiodisme Jove scholarship and worked on a project about the third gender in India, which was shown at ‘Visa Pour l’Image’ in France. During the pandemic, she collaborated with ‘Archivo Covid’. Her recent project, ‘Endangered Stonecutters’ received the ‘XX Premi de Joves Fotògraf(e)s de Catalunya’ prize, and was exhibited at photography festivals, including Biennal Xavier Miserachs and FineArt Igualada.
